
Let’s imagine a scenario. You are towing your caravan or driving your motorhome along a country lane flanked with hedges. In fact, let’s up the ante. Let’s say they are spikey hawthorn hedges. Perhaps your Sat Nav has taken you the wrong way, or there is an oncoming vehicle. You then need to pull into the side of the road and hear that terrible screeching sound as the hedge rubs down the side of your caravan or motorhome. When you finally get to your destination to see if there is any damage. You breathe a sigh of relief and find no damage to the paintwork. However, when you look at the side windows of your caravan or motorhome, you see a range of scuffs, light scratches and deep scratches. Your heart sinks, however, fear not. With a bit of careful DIY, even those deep window scratches can be repaired with the right products and a bit of elbow grease.

Unfortunately in some cases removing window scratches is not simply a case of rubbing on some scratch remover: Image – Amazon.co.uk
Disclaimer: Hey! By the way… any links on this page that lead to products on Amazon or Caravan Guard are affiliate links, and I earn a commission if you make a purchase, with no additional cost to you 🙂
- Dissolves waste and removes odours naturally and has delightful mild fragrance
You obviously could get your dealer to repair those window scratches during your next annual service.
However, I’m going to take a guess that the fact you are reading this post means you are willing to have a go and fix those window scratches yourself.
Most caravan and motorhome owners should be able to repair scuffs and scratches on their windows. However, as always, there is a right and a wrong way to approach DIY.
Preparation is the key, not only with the right materials and tools but also fully understanding the process and best practice.
I would encourage you to read this whole post. However, if you are in a rush, the Table of Contents below may be of assistance.
Want To Visit Horton Common? – Book Here
Table of Contents
Introduction To Removing Scratches On Caravan/Motorhome Windows
Where possible, I like to use videos in my posts which I feel provide the best advice on how to address a particular issue.
This post on repairing window scratches is no different. Practical Caravan produced the video below with John Wickersham several years ago.
However, I still feel it provides the best instructional video on how to approach the process of removing window scratches today.
Unfortunately, John has since passed away, but his valuable knowledge and advice live on in these videos.
Its short at under 5 minutes long, and shows the correct method of how to remove a deep window scratch.
After you have watched the video, I’ll provide a summary of the process below, along with a few additional tips and cautions.
Light Scuffs & Scratches vs Deep Window Scratches
The video above, presented by John, focuses on deep window scratches, which I’ll discuss more below.
What I did quickly want to clarify is this process may not be necessary if your caravan or motorhome windows only have light surface scratches or scuffs.
In other words, if you can’t feel the window scratch when going over it with your fingernail. If that’s the case, potentially just using a bit of the Fenwicks Windowize Scratch Remover on a cloth may do the trick.
There are other products available online besides Fenwicks, from Mellerud and Domestic. So read the reviews and take your pick.
The reason I wanted to emphasise this point is that you don’t want to go down the route of using sandpaper (wet and dry) on your windows unless you really have to.
After all, you are effectively reducing the thickness of the acrylic plastic in that particular area of the window to mask the scratch.
Therefore, from that point forward, that part of the window is thinner and hence more vulnerable to cracks and splits from stone clips etc.
How To Remove Deep Window Scratches
Whether you want to remove the scratched window from your caravan or motorhome to work on it or carry out the work in situ.
The first step is to make sure the window is clean. If its not and you start using wet and dry on the surface of the window, that could potentially lead to even more scratches and scuffs.
I do quite a bit of DIY, not only around Horton Common but also in my home (not to brag, but I built it myself).
Anyway, typically, when it comes to any smooth surface such as this, it would be fairly typical to do the final clean of a surface with methylated spirits.
However, in this case, please do not use methylated spirits to clean acrylic plastic windows. Now, using solvent/alcohol cleaners such as methylated spirits may not always appear to be an issue.
That’s because it depends on how much previous damage heat has done to the acyclic to denture the material.
If you are interested in finding out more about how solvents can cause microcracks and crazing in acyclic, this video is a good watch.
Using Wet and Dry Sandpaper To Remove The Scatch
So as discussed above, if you have tried just using Fenwicks Windowize Scratch Remover on its own and that hasn’t removed the scratch, then you are going to have to go with some wet and dry.
However, you have to be careful not to use wet and dry, which is more abrasive than it needs to be. You want to use a grade of wet and dry which will gradually get down to the bottom of the scratch.
Then its a case of using finer grades of wet and dry to smooth out the area to leave the best finish possible on the window.
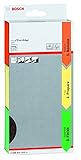
- Colour-coding makes selection much easier compared to competitor products without colour coding
- Long service life 3-4 times longer service life than handheld sanding sheets due to washability and good quality
- Adaptability The material adapts to any shape while the foam hand sanding block is stiff and inflexible
- Save shelf space with 3-piece set compared to 1 pack
- Made in Great Britain
Lower numbers on wet and dry sandpaper indicate a courser grit grade and higher numbers indicate a finer grit grade.
You initially start with a coarse grit paper to reach the bottom of the scratch, and the finer grades are used to create a smooth surface to match the rest of the window.
In the video above, John is using a kit which starts with a 2,000 grade, then a 2,500 and finishes up with a 3,000 grade. I’ve seen others advising to start with 1,500 grade, then 2,000 and finish at 2,500.
Personally, I would follow John’s advice above, starting with 2,000 and finishing up at 3,000. It may take you slightly longer to achieve the finish on the window you desire.
However, you are less likely to remove more acrylic than you really need to.
Take Your Time To Avoid Excessive Friction & Heat
Besides using the higher numbered grades of wet and dry to avoid taking too much acrylic off the window to remove the scratch, taking your time is equally important.
If you rush and rub the surface of the window too vigorously, you will generate more friction and hence more heat.
Remember, the side windows on your caravan or motorhome are made from acrylic, a form of plastic.
Well, plastic melts quite easily, and if you rub too hard or too vigorously with the sandpaper, it can melt the surface of the window.
Hence, using water can help to lubricate the surface and keep it cool. Just bear in mind, if you are using standard cheap sandpaper, it will break apart quite easily when wet.
Sand Along The Scratch, Not In Circles
This point is very important. As referenced above, you are trying to remove just enough acrylic from the window to remove the scratch, but no more.
If you sand in circles, you can take away more acrylic from an area where the scratch isn’t present.
Its also best practice, as shown in the video, is to alternate the direction of sanding along with scratch. This will give you the best chance of achieving a smooth final finish.
Using Window Scratch Remover Compound
You should stop using wet and dry once you can no longer feel the scratch when passing your nail over the surface.
However, you’re still not finished, the area of the scratch will appear dull and not shiny like the rest of the window.
In the video above, John shows using an electric portable drill with a polishing pad to apply the Fenwicks Windowize Scratch Remover.
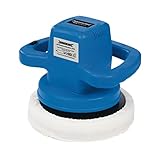
- Random orbit action
- Twin density foam pad
- Comfortable dual-handle design
- For polishing and buffing vehicle bodywork
- Includes synthetic textile bonnet and synthetic wool bonnet
John references only using a drill with a low-speed setting. However, personally, I would still avoid the use of a drill polishing pad or electric car polisher.
The reason is, I’ve seen friends use electric car polishers in the past. When all goes to plan, they can produce some amazing results.
However, a quick lapse in concentration can lead to a nightmare. If the polishing pad has even the slightest bit of contamination that could be abrasive, even after short use, the results could make you cry.
You may think everything is going to plan, only to stand back and see thousands of tiny swirl marks left by that abrasive combination.
Therefore, the time saved in using such a device quickly disappears when you consider what its going to take to correct that damage.
Personally, I would still do the final polish of the window by hand with a good quality microfibre cloth. After going over the surface a couple of times, step back to see the results.
That way, if the cloth had got contaminated with a small bit of grit etc, you haven’t created too much of an issue to correct it.
Conclusions On Removing Scratches From Caravan & Motorhome Windows
I believe, in most cases, pretty much any caravan or motorhome owner with a bit of DIY can remove even deep scratches from their acrylic windows.
However, you need to take your time and be as gentle with the window surface as possible.
Yes, with a deep scratch, you are effectively going to have to remove some of the window surface to hide that scratch.
By taking your time and using higher-grade wet and dry sandpaper, you will only remove as much of the window surface as you absolutely have to.
For those considering a second-hand caravan purchase, being able to correct potential window scratches can be very useful knowledge.
Products such as Fenwicks Windowize Scratch Remover can potentially remove light window scuffs and scratches on its own.
With deep scratches, Windowize is used as the final polishing agent, to provide the best surface finish possible.
I hope you found this post useful and that it has given you the confidence to do a bit of DIY and remove that annoying window scratch yourself.
I also hope you consider coming to visit us here at Horton Common in the near future to experience our fully serviced pitches. 🙂
FAQ
T-Cut is an abrasive rubbing compound which could potentially be used to remove window scratches on caravans and motorhomes.
In a previous post on how not to clean your caravan, I advised against the use of T-Cut on thin caravan paintwork. I still would not advise using T-Cut on caravan or motorhome windows.
It could work. However, it is more abrasive than Fenwicks Windowize Scratch Remover. Hence you would have to be more careful, and T-Cut may not provide a surface finish to the same standard.
Want To Visit Horton Common? – Book Here