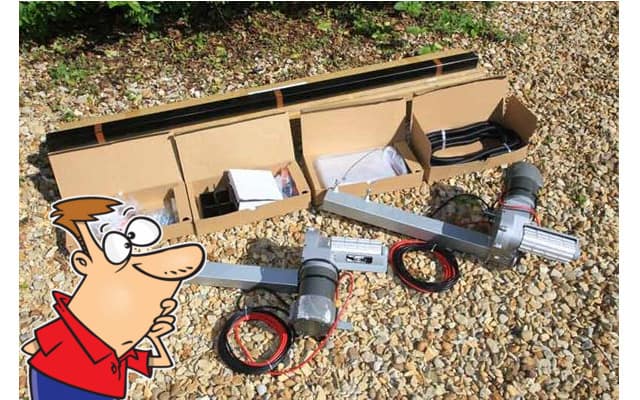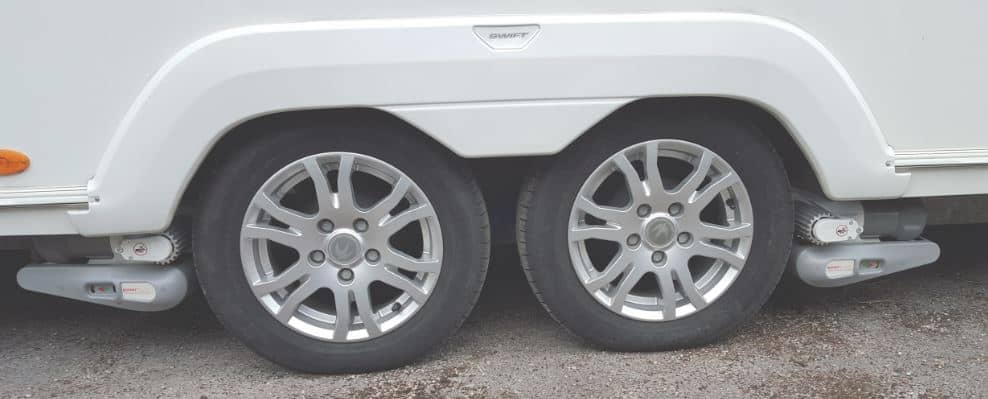
A significant number of our guests visit Horton Common every year with a motor mover fitted to their caravan. They are not only an excellent tool to help you position a caravan onto a pitch, but also to manoeuvre the caravan on your driveway or at the storage yard. The ‘problem’ with motor movers is they can cost a significant amount of money. Therefore, I know of at least one of our guests who has previously taken up the challenge of a DIY motor mover install.

Disclaimer: Hey! By the way… any links on this page that lead to products on Amazon or Caravan Guard are affiliate links, and I earn a commission if you make a purchase, with no additional cost to you 🙂
- Dissolves waste and removes odours naturally and has delightful mild fragrance
Now, its worth pointing out that not every caravan motor mover on the market is available for a DIY install. I have an extensive post on the majority of caravan motor movers currently on the market.
I know that certain motor movers such as the AL-KO Ranger or Mammut are not available for a DIY install.
Commonly if you are looking for a motor mover available as a DIY install, it will be one of the Emove branded motor movers.
We have a couple of guests with this brand of motor mover. I’ve not heard any complaints about their performance etc.

This is the Emove EM203 manual engagement motormover available for DIY installation: Image – Amazon.co.uk
Below I’ve included a video from Martin, or as he refers to himself on YouTube, ‘The Caravan Nut’.
Martin has produced an excellent video, the best I’ve found for a DIY install on how he fitted his Emove motor mover.
So while there are other brands of motor mover you could consider for a DIY install, one of the Emove motor mover products is not a bad option to consider.
Want To Visit Horton Common? – Book Here
Table of Contents
Introduction – How To Install A Caravan Motor Mover
Before you consider a DIY install of a motor mover on your caravan, there are a couple of points to consider first.
To add professional installation from some companies that sell motor movers, it will typically add around £150 to the total price.
Now, that’s a very small amount of money for the average cost of a caravan motor mover, typically around £1,000.
However, the retailer is making a profit margin on the sale of the motor mover itself. So they can afford to offer a low install price.
Therefore, my point is, if you went to a third-party caravan motor mover installer who didn’t sell you the motor mover, they are unlikely to be able to offer you a £150 install cost.
However, if you are purchasing a new motor mover from a retailer and they offer such a low install price, its probably worth it.
However, as stated above, in some instances, you may want to fit a second-hand motor mover purchased off eBay.
In other instances, you may just actually like DIY (as I do) and fancy the challenge of DIY motor mover install.
However, there are some other points to consider before you take up the DIY motor mover challenge.
How Are Your Knees and Back?
Bit of an odd section title for a post on motor movers, but I think you can see where I’m going with this. Caravan dealers and service centres who install motor movers can lift the caravan up on hydraulic ramps.
For a DIY install (unless you’re very lucky), you won’t be able to do this. Hence, you’re going to spend several hours on your hands and knees or lying on your back under the caravan.
Hence, you need to factor in the potential pain of this caravan motor mover DIY install before taking on the challenge.
Yes, you will have jacked up the caravan and put the chassis on axle stands for safety, but access to install the motor mover is still a challenge in and of itself.
Obviously, if you do want to carry out your own DIY caravan motor mover install use some padded protected clothing, such as knee pads. I wear knee pads every time I’m outside doing DIY.
Ready For The Challenge? How To Install A Motor Mover
There are a couple of other websites on the net that have covered this topic. They have used pictures to illustrate the process. Its not bad content but its not as easy to follow as a video.
As stated previously at the top of this post, the best video I’ve found on how to install a caravan motor mover is the one below by Martin, ‘The Caravan Nut’.
If you do want to consider taking on your own DIY caravan motor mover project, even if its a different motor mover to the Emove, this video is well worth a watch:
Martin goes through the whole process, starting with all the components that are included with the motor mover. He then shows how the brackets need to be fitted to the caravan chassis.
Furthermore, how the motor movers are mounted and adjusted, Martin then shows the electrical installation. A good place to fit the control unit and isolation switch is in the leisure battery compartment.
Fitting The Motor Mover In Front Or Behind the Caravan Axle?
In Martin’s case, he has fitted the motor mover in front of the caravan axle. This is by far the most popular and generally recommended approach by most caravan motor mover manufacturers.
The potential downside to this location is it will increase the noseweight of the caravan. So that’s worth bearing in mind if your caravan is already close to its limit.
While I’m discussing weights, its important to note the weight of the motor mover will have to be discounted from your caravan’s payload allowance.

What about positioning the motor mover behind the caravan’s axle? This is possible in many cases, and with twin-axle caravans and a four-motor setup, its actually required.
Positioning the motor mover behind the axle will not increase the caravan’s noseweight; it will obviously do the opposite. That change in weight distribution does also need to be considered.
As if the nose weight is too light, that will also result in poor towing and caravan instability.
A problem with positioning the motor mover behind the axle is road debris, stones etc. Located behind the wheel, in transit, the caravan tyres will throw dirt and stones up at the motor mover.
Potentially leading to motor mover problems in the future.
Is Your Leisure Battery Up To the Job?
As I’m sure you can imagine, motor movers, during use, put your caravan’s leisure battery through its toughest test. Therefore, in some cases, the existing leisure battery is just not up to the job.
To learn more about the various different types of leisure batteries available, I have a post on the best leisure battery technologies.
Each motor mover’s requirements are different based on the amp draw of the motors.
The point is, to check the amp rating of your leisure battery and compare it to your chosen motor movers requirements.
Typically a leisure battery with a minimum 85AH rating is required for a motor mover. Though personally, I think at least a 100AH leisure battery is needed for reliable motor mover operation.

As part of your DIY motor mover project you may need to factor in the cost of a higher capacity leisure battery, 100AH plus is usually required: Image – Amazon.co.uk
Therefore, you may need to factor in the additional cost of a new leisure battery of sufficient size as part of your DIY motor mover project.
What if your leisure battery is of sufficient size but still struggles to run the motor movers?
Well, with a bit of TLC from a decent quality leisure battery charger, it may bring it back close to its full capacity.
The general point is though, there is no point in having a powerful set of caravan motor movers if your leisure battery is not up to the task of running them.
Manual Or Automatic Engagement Motor Motors?
In the video above, Martin chose to install the Emove EM203, which is a manual engagement motor mover.
Towards the end of the video, you can see Martin use the winding tool to engage the motor movers against the caravan tyres.
Now, there is another category of motor mover you may wish to consider, and that is automatic engagement motor movers.
Essentially there are additional motors which position the motor movers against the caravan tyres for you via a button on the remote control.
As you would expect, for this convenience, you have to pay a little bit more.
For instance, Emove offers the EM303A, which is their automatic engagement motor mover is several hundred pounds more than the manual engagement EM203.

The Emove EM303A is an example of an automatic engagement caravan motor mover available for DIY installation: Image – Amazon.co.uk
Now, a quick tip for you. If you do opt for an automatic engagement motor mover, from Emove or any other brand, make sure you know where the manual release is.
I’ve had guests in the past who have turned up to Horton Common, their motor mover has automatically engaged against the caravan wheels, and then the leisure battery died.
What follows is a bit of panic, as you cannot push or tow the caravan until the motor movers have been released.
Each automatic engagement motor mover has a release screw which you have to wind out in the scenario of battery failure. So make sure you know where the release screw is on the motor mover.
Conclusions On DIY Caravan Motor Mover Installations
Whether you are looking to purchase a new caravan motor mover or a second-hand mover from eBay, a DIY installation is possible with sufficient time, patience and the right tools.
However, as with any second-hand eBay purchase, be careful. You don’t want to spend hours fitting the motor mover only to find it has suffered from motor failure etc.
As noted above, carefully consider if fitting the motor mover in front or behind your caravan’s axle is the best option for your caravan.
Furthermore, you will need to decide if you want to save money on a manual engagement motor mover or pay for the convenience of automatic engagement.
Finally, check the capacity and condition of your leisure battery. The performance of your motor mover will ultimately depend on the capabilities of your leisure battery.
Thanks for reading. I hope you found this post useful. I also hope in the near future, you consider coming to visit us here at Horton Common caravan site.
Want To Visit Horton Common? – Book Here


